No Result
View All Result
DevRescue
  • Home
  • Python
  • Lists
  • Movies
  • Finance
  • Opinion
  • About
  • Contact Us
  • Home
  • Python
  • Lists
  • Movies
  • Finance
  • Opinion
  • About
  • Contact Us
DevRescue
Home Blog Python

Screenshot including Mouse Pointer with Python

by Khaleel O.
May 22, 2022
in Python
Reading Time: 5 mins read
A A
python screenshot mouse pointer

Let’s write Python code to take a screenshot that includes the Mouse Pointer. Let’s go! 🔥⚡✨

It’s important to note that the code we will soon write is designed for Windows 10 and its different flavors, it may not run on non-Windows systems. Now, let’s install the modules we will need:

pip install win32gui
pip install pywin32
pip install Pillow

The pywin32 and win32gui libraries will give us access to the Win32 API libraries from our Python code. PIL is Pillow, a Python imaging library.

Let’s write our first function get_cursor():

def get_cursor():
    hcursor = win32gui.GetCursorInfo()[1]
    hdc = win32ui.CreateDCFromHandle(win32gui.GetDC(0))
    hbmp = win32ui.CreateBitmap()
    hbmp.CreateCompatibleBitmap(hdc, 36, 36)
    hdc = hdc.CreateCompatibleDC()
    hdc.SelectObject(hbmp)
    hdc.DrawIcon((0,0), hcursor)
    
    bmpinfo = hbmp.GetInfo()
    bmpbytes = hbmp.GetBitmapBits()
    bmpstr = hbmp.GetBitmapBits(True)
    cursor = Image.frombuffer('RGB', (bmpinfo['bmWidth'], bmpinfo['bmHeight']), bmpstr, 'raw', 'BGRX', 0, 1).convert("RGBA")
    
    win32gui.DestroyIcon(hcursor)    
    win32gui.DeleteObject(hbmp.GetHandle())
    hdc.DeleteDC()

    return cursor

Let’s explain what is happening here:

  1. Usually a screenshot doesn’t show the mouse pointer/cursor position or type. The purpose of this function is to detect and preserve the position and type of the cursor on the screen. It returns value cursor which is an image object that represents our on-screen mouse cursor.
  2. We use several Win32 API functions to get an image of the cursor that is on-screen when we take a screenshot.
  3. Image.frombuffer() creates an image memory with pixel data in a byte buffer. This method will return an image of our cursor.

Next we write pointer_ellipse() function which will draw an ellipse around the mouse pointer for enhanced visibility:

def pointer_ellipse(image_path, output_path, xpos, ypos):
    image = Image.open(image_path)
    draw = ImageDraw.Draw(image,'RGBA')
    draw.ellipse((xpos-30, ypos-30, xpos+30, ypos+30), outline="black", width=1, fill=(100, 100, 0, 128))
    image.save(output_path)

Let’s explain what is happening here:

  1. This function will accept 4 parameters:
    • image_path which is the original screenshot image.
    • output_path is the final screenshot with the mouse pointer and a small ellipse around the mouse pointer.
    • xpos is the x coordinate for the mouse pointer location
    • ypos is the y coordinate for the mouse pointer location
  2. We open the original screenshot image and draw a small, transparent yellow ellipse with the draw.ellipse() function. This ellipse/marker will be drawn around the position of the mouse pointer or cursor to make it easier to see.
  3. Finally, save the modified image to disk.

Here is our complete code:

import ctypes, win32gui, win32ui
from PIL import Image, ImageGrab, ImageDraw

import time

def get_cursor():
    hcursor = win32gui.GetCursorInfo()[1]
    hdc = win32ui.CreateDCFromHandle(win32gui.GetDC(0))
    hbmp = win32ui.CreateBitmap()
    hbmp.CreateCompatibleBitmap(hdc, 36, 36)
    hdc = hdc.CreateCompatibleDC()
    hdc.SelectObject(hbmp)
    hdc.DrawIcon((0,0), hcursor)
    
    bmpinfo = hbmp.GetInfo()
    bmpbytes = hbmp.GetBitmapBits()
    bmpstr = hbmp.GetBitmapBits(True)
    cursor = Image.frombuffer('RGB', (bmpinfo['bmWidth'], bmpinfo['bmHeight']), bmpstr, 'raw', 'BGRX', 0, 1).convert("RGBA")
    
    win32gui.DestroyIcon(hcursor)    
    win32gui.DeleteObject(hbmp.GetHandle())
    hdc.DeleteDC()

    pixdata = cursor.load()
    minsize = [32, None]

    width, height = cursor.size
    for y in range(height):
        for x in range(width):

            if pixdata[x, y] == (0, 0, 0, 255):
                pixdata[x, y] = (0, 0, 0, 0)

            else:
                if minsize[1] == None:
                    minsize[1] = y

                if x < minsize[0]:
                    minsize[0] = x

    return cursor

def pointer_ellipse(image_path, output_path, xpos, ypos):
    image = Image.open(image_path)
    draw = ImageDraw.Draw(image,'RGBA')
    #draw.ellipse((100, 150, 275, 300), outline="black", width=1, fill=(100, 100, 0, 128))
    draw.ellipse((xpos-30, ypos-30, xpos+30, ypos+30), outline="black", width=1, fill=(100, 100, 0, 128))
    image.save(output_path)


time.sleep(3) #gives us time to set up the scene

size = round(ctypes.windll.shcore.GetScaleFactorForDevice(0) / 100 * 32)

cursor = get_cursor()

pixdata = cursor.load()
minsize = [size, None]

width, height = cursor.size
for y in range(height):
    for x in range(width):

        if pixdata[x, y] == (0, 0, 0, 255):
            pixdata[x, y] = (0, 0, 0, 0)

        else:
            if minsize[1] == None:
                minsize[1] = y

            if x < minsize[0]:
                minsize[0] = x

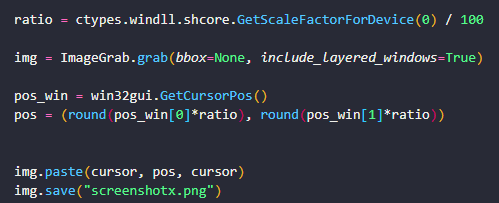
ratio = ctypes.windll.shcore.GetScaleFactorForDevice(0) / 100

img = ImageGrab.grab(bbox=None, include_layered_windows=True)

pos_win = win32gui.GetCursorPos()
pos = (round(pos_win[0]*ratio), round(pos_win[1]*ratio))

img.paste(cursor, pos, cursor)
img.save(f"screenshotx.png")
pointer_ellipse(f"screenshotx.png", f"ellipse_{int(time.time())}.png", pos[0], pos[1])
              

Let’s explain what is happening here:

  1. We add a small pause before the main statement body executes because this gives us time to set up the scene to be recorded with the screenshot. The sleep() function takes one integer parameter which represents the number of seconds to wait before taking the screenshot.
  2. So next we begin the main body of the program. We call get_cursor() function and then the screenshot is taken and saved to disk with the img.save() method. But just before this happens, we call img.paste() which paints the exact position and type of the mouse pointer/cursor in the screenshot to be saved.
  3. Finally, we call pointer_ellipse() function which will paint the yellow circle around the mouse pointer.
  4. When the above code executes we will have two new image files in the same directory as the python script:
    • screenshotx.png, which is the screenshot that contains the mouse pointer
    • ellipseXXXXXXXXXX.png, which is the final screenshot that contains the mouse pointer and the pale yellow circle. We also append the date and time to the file name for record keeping purposes.

Great! So we achieved our goal. Let’s see what our screenshots look like:

python screenshot mouse pointer
Screenshotx.png – Screenshot with Cursor
python screenshot mouse pointer
Ellipse.png – Screenshot with cursor and marker

Thanks for reading! And keep on coding! 👌👌👌

Tags: pillowscreenshotswin32
Previous Post

How to Download Instagram Reels in Python

Next Post

Coca-Cola Logo Pixel Art in Python

Khaleel O.

Khaleel O.

I love to share, educate and help developers. I have 14+ years experience in IT. Currently transitioning from Systems Administration to DevOps. Avid reader, intellectual and dreamer. Enter Freely, Go safely, And leave something of the happiness you bring.

Related Posts

Python

Python Fibonacci Recursive Solution

by Khaleel O.
January 16, 2024
0
0

Let's do a Python Fibonacci Recursive Solution. Let's go! 🔥🔥🔥 The Fibonacci sequence is a series of numbers in which...

Read moreDetails
Python

Python Slice String List Tuple

by Khaleel O.
January 16, 2024
0
0

Let's do a Python Slice string list tuple how-to tutorial. Let's go! 🔥🔥🔥 In Python, a slice is a feature...

Read moreDetails
Python

Python Blowfish Encryption Example

by Khaleel O.
January 14, 2024
0
0

Let's do a Python Blowfish Encryption example. Let's go! 🔥 🔥 Blowfish is a symmetric-key block cipher algorithm designed for...

Read moreDetails
Python

Python Deque Methods

by Khaleel O.
January 14, 2024
0
0

In this post we'll list Python Deque Methods. Ready? Let's go! 🔥🔥🔥 A deque (double-ended queue) in Python is a...

Read moreDetails

DevRescue © 2021 All Rights Reserved. Privacy Policy. Cookie Policy

Manage your privacy

To provide the best experiences, we and our partners use technologies like cookies to store and/or access device information. Consenting to these technologies will allow us and our partners to process personal data such as browsing behavior or unique IDs on this site and show (non-) personalized ads. Not consenting or withdrawing consent, may adversely affect certain features and functions.

Click below to consent to the above or make granular choices. Your choices will be applied to this site only. You can change your settings at any time, including withdrawing your consent, by using the toggles on the Cookie Policy, or by clicking on the manage consent button at the bottom of the screen.

Functional Always active
The technical storage or access is strictly necessary for the legitimate purpose of enabling the use of a specific service explicitly requested by the subscriber or user, or for the sole purpose of carrying out the transmission of a communication over an electronic communications network.
Preferences
The technical storage or access is necessary for the legitimate purpose of storing preferences that are not requested by the subscriber or user.
Statistics
The technical storage or access that is used exclusively for statistical purposes. The technical storage or access that is used exclusively for anonymous statistical purposes. Without a subpoena, voluntary compliance on the part of your Internet Service Provider, or additional records from a third party, information stored or retrieved for this purpose alone cannot usually be used to identify you.
Marketing
The technical storage or access is required to create user profiles to send advertising, or to track the user on a website or across several websites for similar marketing purposes.
Statistics

Marketing

Features
Always active

Always active
  • Manage options
  • Manage services
  • Manage {vendor_count} vendors
  • Read more about these purposes
Manage options
  • {title}
  • {title}
  • {title}
Manage your privacy
To provide the best experiences, DevRescue.com will use technologies like cookies to store and/or access device information. Consenting to these technologies will allow us to process data such as browsing behavior or unique IDs on this site. Not consenting or withdrawing consent, may adversely affect certain features and functions.
Functional Always active
The technical storage or access is strictly necessary for the legitimate purpose of enabling the use of a specific service explicitly requested by the subscriber or user, or for the sole purpose of carrying out the transmission of a communication over an electronic communications network.
Preferences
The technical storage or access is necessary for the legitimate purpose of storing preferences that are not requested by the subscriber or user.
Statistics
The technical storage or access that is used exclusively for statistical purposes. The technical storage or access that is used exclusively for anonymous statistical purposes. Without a subpoena, voluntary compliance on the part of your Internet Service Provider, or additional records from a third party, information stored or retrieved for this purpose alone cannot usually be used to identify you.
Marketing
The technical storage or access is required to create user profiles to send advertising, or to track the user on a website or across several websites for similar marketing purposes.
Statistics

Marketing

Features
Always active

Always active
  • Manage options
  • Manage services
  • Manage {vendor_count} vendors
  • Read more about these purposes
Manage options
  • {title}
  • {title}
  • {title}
No Result
View All Result
  • Home
  • Python
  • Lists
  • Movies
  • Finance
  • Opinion
  • About
  • Contact Us

DevRescue © 2022 All Rights Reserved Privacy Policy