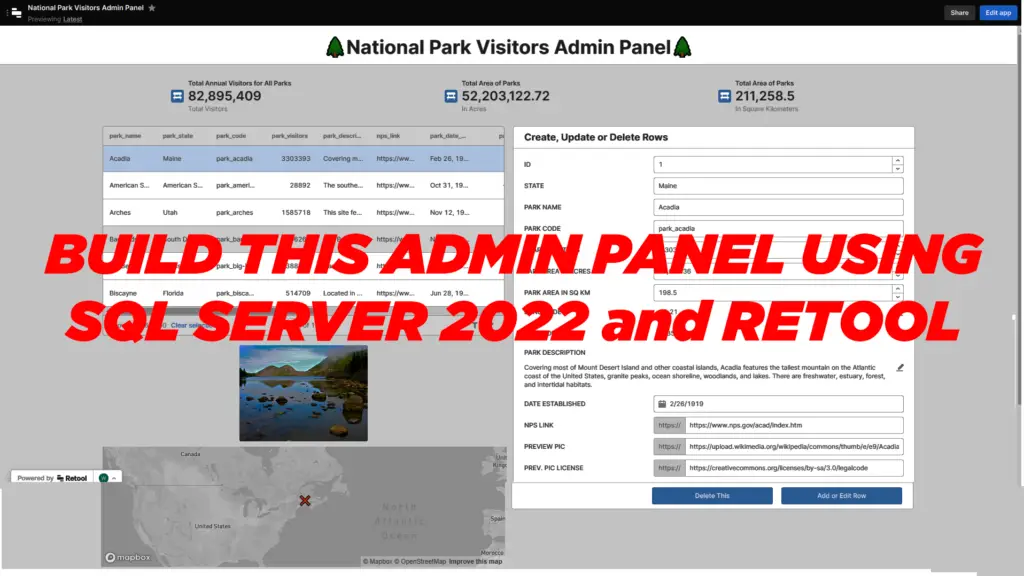
In this article you will learn how to build an Admin Panel in Retool with a SQL Server 2022 Database backend.
Microsoft SQL Server also known as MS SQL Server or simply as MSSQL, is a relational database management system (RDBMS). Beginning its life in the late 1980s, it has grown to become one of the world’s most popular and trusted database solutions for large scale enterprise use. It now features a range of supporting services beyond the traditional RDBMS including machine learning, high availability, analytics, enhanced security and performance and more in both on-premises and cloud implementations. The latest release of MSSQL, SQL Server 2022, is in the preview stage as of this writing.
Retool is a platform that provides components and controls for rapid development of internal tools with rich user experiences. Internal tools such as Admin Panels are what empower operators, administrators, analysts, managers and executive staff to manage data and system configurations, monitor real-time operations or perform any other critical administrative function.
In this article you will connect Retool to a SQL Server 2022 instance and build an Admin Panel using Retool forms and GUI components to perform CRUD (create, read, update and delete) operations on some sample data.
You will proceed in the following sequence:
– Acquire the Prerequisites
– Provision Ubuntu VM On Google Cloud with SQL Server 2022 running in a Docker Container
– Load Sample Data into SQL Server 2022 instance
– Build out Retool Admin Panel
Prerequisites
You will need to set up the following before moving forward:
– Google Cloud Platform (GCP) Account
– Retool Account
GCP Account Setup and VM Provisioning for SQL Server 2022 Instance
You will require a GCP account to provision your SQL Server 2022 (Preview) instance. Specifically, you will launch an instance of SQL Server as a Docker Container on the Ubuntu 20.04 LTS operating system.
There are many ways you can provision SQL Server using other cloud providers such as AWS and Microsoft Azure but for this article GCP will be used. Also, because of the SQL Server System Requirements for disk space and memory, finding a completely Free Tier with these specs on any of these platforms would prove difficult.
Fortunately, GCP has a free trial offer for customers that meet the eligibility criteria. The trial runs for a 90-day period that includes USD $300 worth of free Cloud Billing credits. This offer should be more than sufficient to complete the example in this article and perform any other experiments you may have planned on GCP.
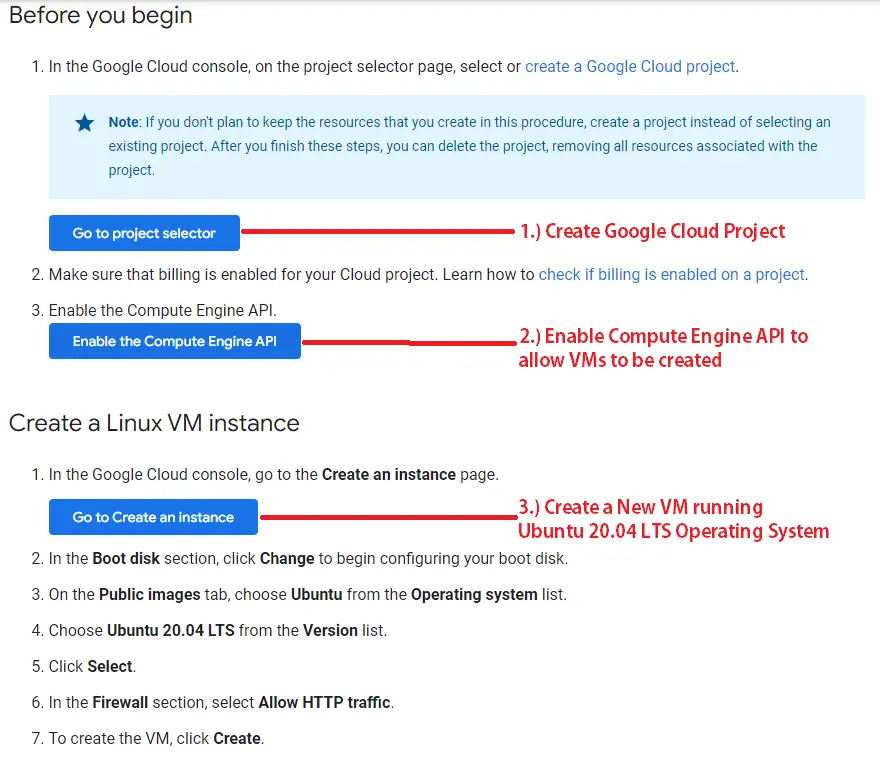
You will require a free Google Account to sign in to GCP and claim the free credits, if you don’t already have one. Once you have signed up and logged into the GCP console you then need to create a Linux VM instance on the Compute Engine. The exact steps will be detailed in the GCP guide but the broad steps are as follows:
1. Create a Google Cloud project.
2. Enable the Compute Engine API to allow VMs to be created.
3. Create a Linux VM running the Ubuntu 20.04 LTS operating system.
The GCP guide will list all individual steps:
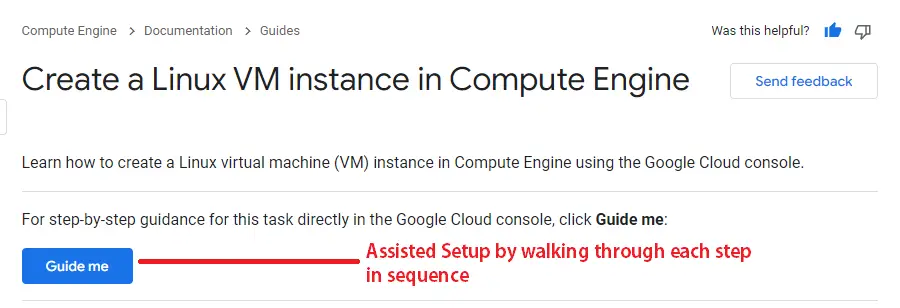
Alternatively the GCP guide gives you the option of the assisted setup which may be a bit easier and faster:
Step 1 and 2 are both straightforward and simple. For this article, the most important is step 3, the creation of the VM, because the requirements here are specific. When you click the Go to Create an instance button to launch the VM setup or proceed through the assisted setup to the Create a Linux VM instance step, you will be asked to provide details for the VM to be created:
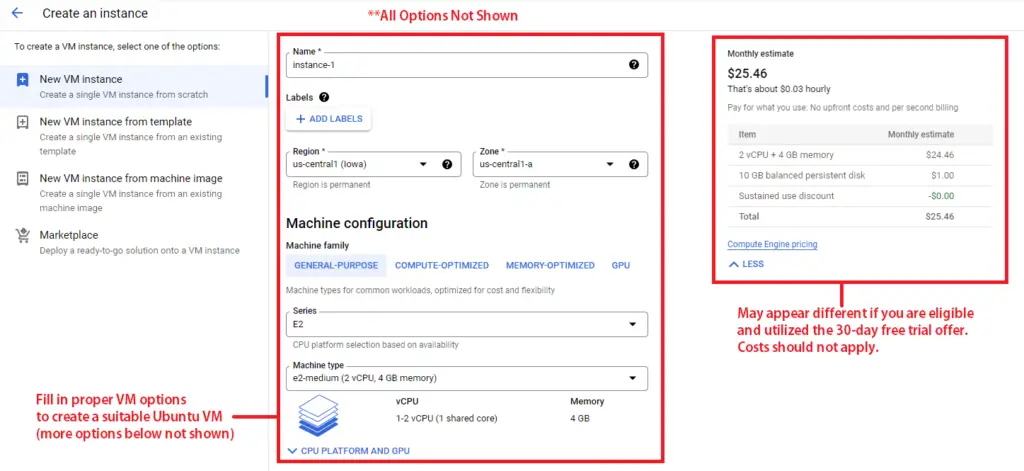
You will now fill in the following details:
– Fill in the instance `Name` with a suitable identifier for the VM and select a `Region` and `Zone` closest to you.
– In the `Machine Configuration Section`, select the `General-Purpose` Machine Family, then select `E2` under `Series` and `e2-medium` under `Machine type`. The e2-medium machine type with its 4GB and 2 vCPUs is more than sufficient to run MSSQL.
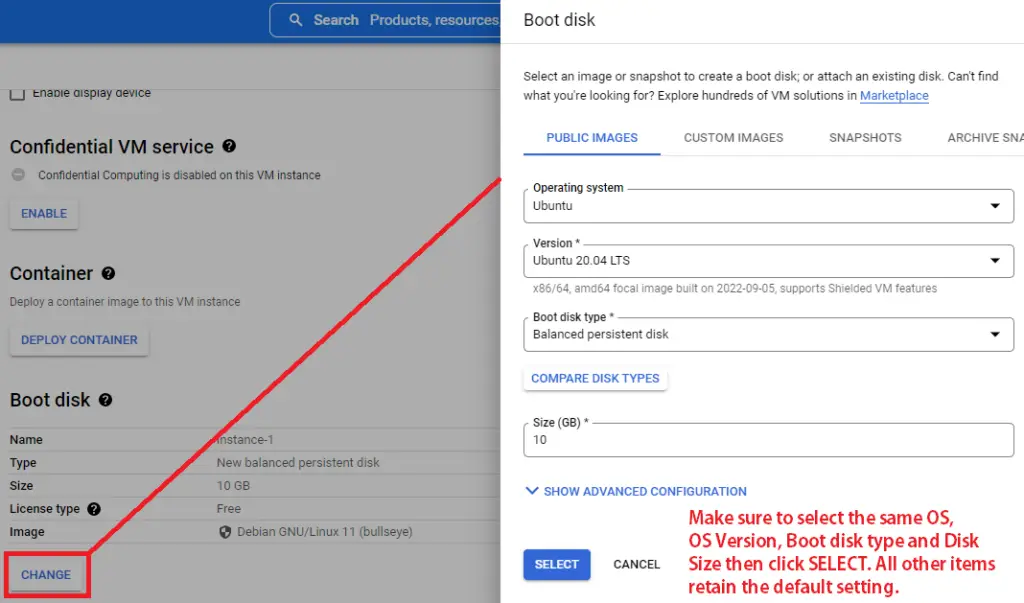
– Under the very important `Boot Disk` section click the `CHANGE` button which should launch another window. In this new window be sure to select `Ubuntu` for the `Operating System`, `Ubuntu 20.04 LTS` for the `Version` and `Balanced Persistent Disk` for the `Boot Disk Type`. Enter a value of 10 or higher for the `Size (GB)` because MSSQL requires a minimum of 6GB available hard-disk space.
– Next, check `Allow HTTP traffic` under the `Firewall` section.
– Every other setting here is fine with the default values. When you are ready to proceed click `CREATE` to begin the VM creation.
When the VM creation is complete you should be redirected to or receive a link to the `VM Instances` page. If not, it may be found by using the left navigation menu, going to `Compute Engine` and then `VM Instances` under the `VIRTUAL MACHINES` section. You should see the newly created VM:
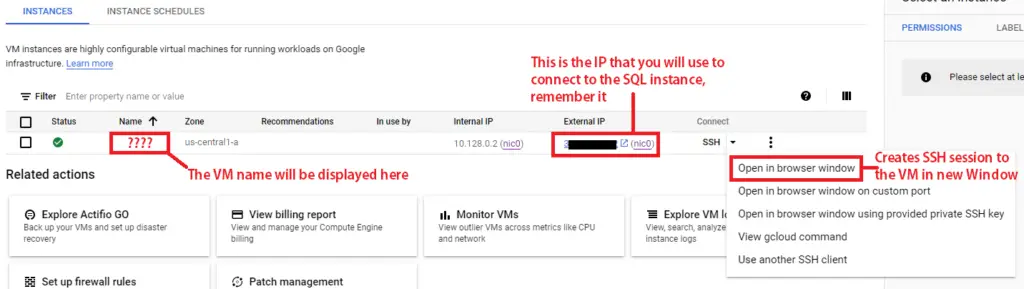
Remember the `External IP` value. This is address that will be used to connect to the SQL instance on the VM.
When you launch a new SSH session in a new browser window, you should see the following at the terminal. This means you successfully provisioned the VM:
Welcome to Ubuntu 20.04.5 LTS (GNU/Linux 5.15.0-1017-gcp x86_64)

 * Documentation:  https://help.ubuntu.com
 * Management:     https://landscape.canonical.com
 * Support:        https://ubuntu.com/advantage

  System information as of Tue Sep 27 06:57:44 UTC 2022

...

New release '22.04.1 LTS' available.
Run 'do-release-upgrade' to upgrade to it.


Last login: Mon Sep 26 22:52:17 2022 from XX.XXX.XXX.XX
user@vmname:~$
This is the terminal where you will issue commands to set up Docker and the SQL container.
The next step would be to set up the MSSQL 2022 Docker container, which will be covered in an upcoming section.
Create a Retool Account
The Admin Panel in Retool with a SQL Server 2022 database will be build in the cloud. This applies to both the database and the admin panel. Navigate to the official Retool website. You should see one button on the upper right hand corner called `Start for free` or near the middle of the page called `Try Retool for free`, either one will take you to the sign up form:

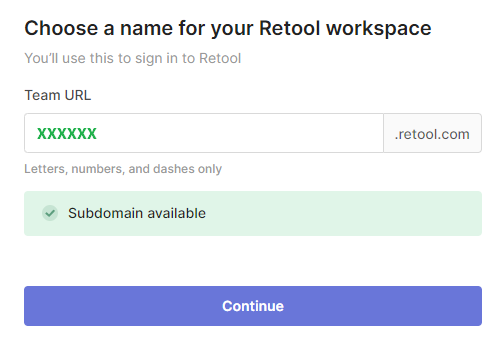
After you enter your details and click `Sign up` or if you choose to `Sign up with Google`, you will be taken to another page to create your Retool workspace which is required to sign in to Retool:
Set up SQL Server 2022 Docker Container instance
Now that the VM is up and running, you must now install the Docker engine. Docker is a popular system used to containerize applications. Containers are self contained executable packages that contain an application and all its dependencies.
The full guide to install Docker engine on Ubuntu contains all of the instructions and terminal commands to get Docker installed and running.
Once Docker is up on the VM, you must now download the free SQL Server 2022 preview container from the official DockerHub repo. You can do this with the following terminal command:
sudo docker pull mcr.microsoft.com/mssql/server:2022-latestThe identifier `mcr.microsoft.com/mssql/server` is the container image and `2022-latest` is the tag for the specific SQL version. After the container image is downloaded, issuing a `docker images` command at the terminal to view all container images will return something similar to the following:
username@vmname:~$ sudo docker images
REPOSITORY                       TAG           IMAGE ID       CREATED         SIZE
mcr.microsoft.com/mssql/server   2022-latest   97XXXXXXXXX   5 weeks ago     1.6GB
mcr.microsoft.com/mssql/server   2019-latest   e3XXXXXXXXX   2 months ago    1.47GB
hello-world                      latest        feXXXXXXXXX   12 months ago   13.3kB
Next, you will issue the `docker run` command to start the container:
sudo docker run -e "ACCEPT_EULA=Y" -e "MSSQL_SA_PASSWORD=XXXXXXXXXX" \
   -p 1433:1433 --name container_name --hostname vm_name \
   -d \
   mcr.microsoft.com/mssql/server:2022-latest
The `-e` option is used to set two mandatory environment variables for the container: the EULA agreement and the SA Password. The `ACCEPT_EULA` variable must always be `Y` and the `MSSQL_SA_PASSWORD` is the SQL SA password and it must be set to a reasonably strong value because it has full permissions to all databases on the SQL instance. Also be sure to remember the password you use here for later.
The `-p` option binds port 1433 of the host to port 1433 of the container. Because this is a SQL Server container the standard SQL Server port for connections is used.
The `–name` option is the custom name for the container.
The `–hostname` option is the host name of the container or the name you give to the VM when you first set it up.
The option `-d` runs the container in the background and prints only the container ID.
When the above command executes successfully the first time, the Container ID should be returned in the terminal. Issuing the following `docker ps -a` commmand should show all running containers:
username@vmname:~$ sudo docker ps -a
CONTAINER ID  IMAGE                                      ... PORTS                                      NAMES
74XXXXXXXXX   mcr.microsoft.com/mssql/server:2022-latest ... 0.0.0.0:1433->1433/tcp, :::1433->1433/tcp  containername
As expected, the container is using port 1433 which would allow you to connect to it remotely if the firewall allows.
On subsequent occasions, you only need to run the `sudo docker start <container_id>` command to start the container from a stopped state and the `sudo docker stop <container_id>` to stop it.
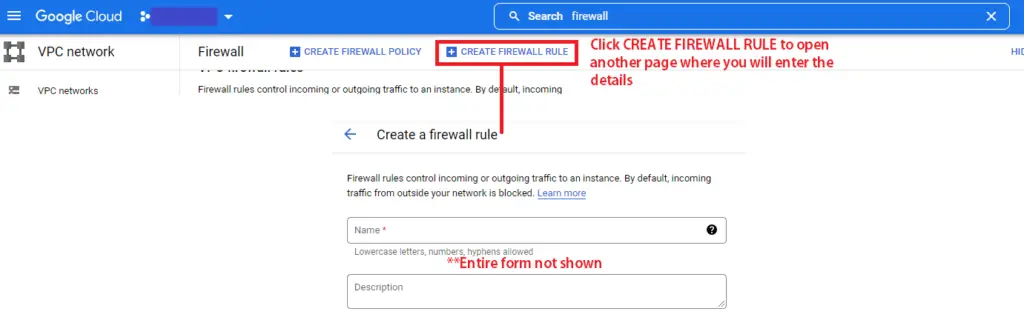
To connect to this instance, database and data from your desktop or Retool you will need to create a new firewall rule in GCP. To do this, navigate back to the GCP console to the `VM instances` page from earlier. There is a search bar at the top where you will enter the word `firewall`. The search should return in its results `Firewall VPC Network` under the Products and Pages section, click it:

Then when the Firewall page comes up click `CREATE FIREWALL RULE` to create a new firewall rule:
You will now fill in the form details of this new rule. Give it a suitable `Name` and `Description`. Next, ensure that `Source Filter` has `IPv4 ranges` selected. Finally under `Protocols and Ports` the `Specified protocols and ports` radio button is selected, check the `TCP` box and enter port number `1433` as the port number. Everything else retains default settings, then you click `CREATE` to create the rule. If you navigate back to the `Firewall` page you should see the new rule in the list of rules under the `VPC firewall rules` section:

Recall that port 1433 was used because that was the VM port that was mapped to the container port 1433 and also because it is the standard SQL port for incoming connections.
Leave the other firewall rules as they are. They should be sufficient to allow Retool to connect to the SQL instance on the VM when the time comes.
Now that the SQL instance is up and running you can try connecting! Remember that `External IP` from earlier and the SA password? You will now use both to test the connection to the SQL instance.
There are many ways you can connect to the instance but using the SSMS tool is one of the most popular. Download and install the SSMS tool to your desktop if you haven’t already done so. Then open up a new connection by navigating to `File` and then `Connect Object Explorer…` in the top menu bar. This will open up a new window where you will enter the connection information:
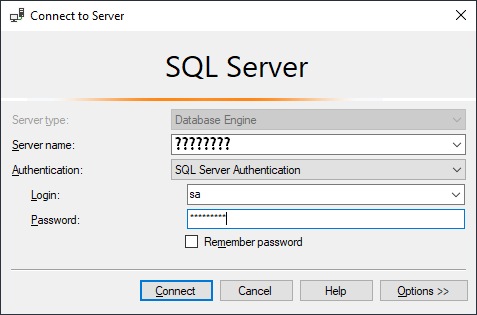
The Server Name value will be the `External IP` for the Ubuntu VM on GCP. The Authentication method will be SQL Server Authentication. The Login will be simply sa and the password will be the password that you supplied for the `MSSQL_SA_PASSWORD` environment variable when you created the docker container. If all goes well, clicking Connect should connect you to the SQL instance on the VM and you should see it in the Object Explorer of the SSMS tool:

The next step would now be to load the sample data into a new database on this instance which you will do in the next section. Click here to proceed to PART 2 of this tutorial on building an Admin Panel with Retool on SQL Server 2022. See you there!